Steps on how to sew a zipper fly easily
The fly front is the most frightening aspect of sewing jeans for many individuals. There are various techniques for installing them, but not all of them are straightforward. We did an extensive study to determine the best technique to stitch the Denim fly front zipper.
If you’re seeking a simple method to sew a zipper fly, this guide is for you! You will learn how to position the zipper and sew the pieces together. The best part about this procedure is that it can be used on any jeans or pants. So, take your sewing supplies, and let’s begin!
This short, straightforward tutorial will walk you through adding a zipper fly to pants or jeans. Proceed in the following manner

Choose the right type of zipper
It would be best if you utilized a regular zipper for pants or jeans fly (not an invisible zipper).
There is a vast variety of zipper sizes, from those used on lightweight clothes like blouses and skirts to those used on jackets and trousers.
The standard zipper length is 22 inches, although sizes range from 6 to 28 inches.
We recommend a longer zipper so that you have more room to maneuver.
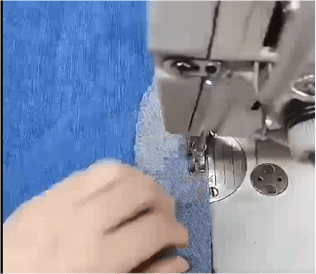
Attach the fly facing
- Place the fly facing the crotch edge on the wrong side of the left front piece.
- Using a sewing machine, attach the fly shield to the fabric with a 10mm straight stitch.
- Start by stitching around the shield’s perimeter, then make a few stitches in the shield’s center.
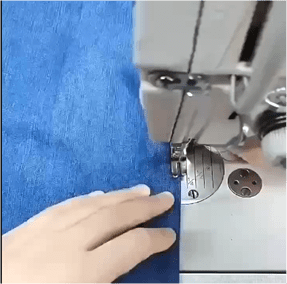
Fold and stitch
Stitch vertically from bottom to top, folding the fly facing so that the able-facing side faces outside.
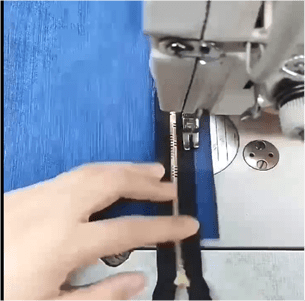
Attach the zipper
Carefully position the zipper on the fly, so it faces down and is aligned with the zipper slider.
Using a sewing machine, begin stitching on the right-hand side of the zipper, moving from the bottom to the top of the zipper as indicated in the figure.
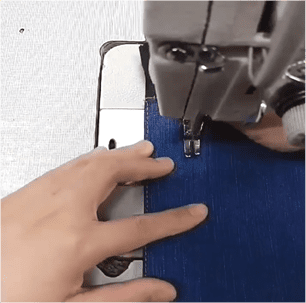
Turn and Stitch
Make sure that the slider on the zipper is pointing up when you turn the fabric over.
Utilizing a sewing machine, begin stitching through the fabric on the right-hand side, working from the bottom to the top, as indicated in the picture.
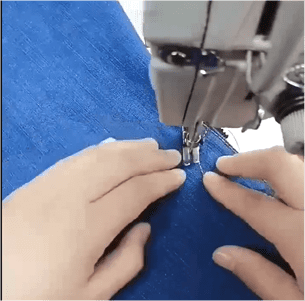
Double stitch fly piece
After that, you will need to perform a double stitch on the fly piece around a few millimeters away from the first stitch we completed before this step.
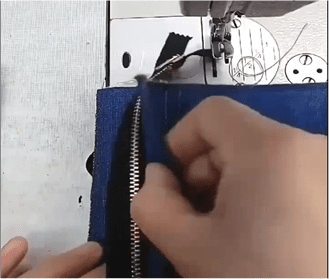
Place the zipper shield
Put the zipper shield in place underneath the zipper in a safe manner.
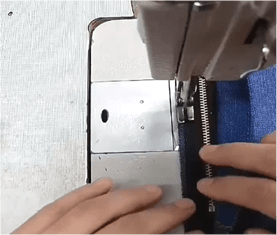
Stitch zipper shield
Stitch on the left-hand side of the zipper to attach the zipper shield to the zip.
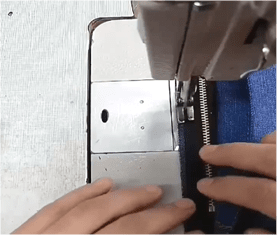
Stitch right front
To join the right front to the zipper, you must first fold the right front piece so that there is a space of about 10 millimeters in the middle, as indicated in the figure. A twice can be used to make adjustments to the fold.
After that, stitch it down until the end of the zipper. During this process stage, the zipper slider must be positioned to face upward.
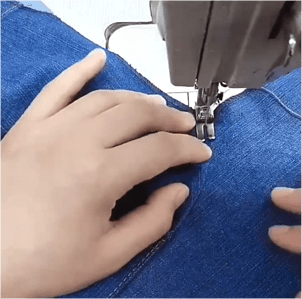
Connect the left and right front
A stitch placed in the crotch point of the trouser can be used to link the left and right fronts of the clothing. While sewing, use a twicer tool to adjust the crotch point of the trouser.
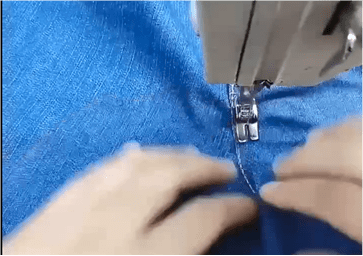
Second stitch on crotch point
To ensure that the left and right fronts remain in place, make a second stitch at the crotch point.
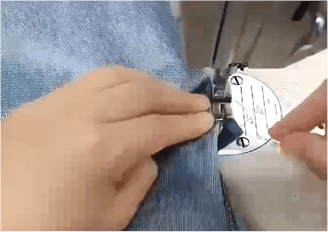
Finishing touches
Lorem ipsum dolor sit amet, consectetur adipiscing elit. Ut elit tellus, luctus nec ullamcorper mattis, pulvinar dapibus leo.
Incredibly, you were able to successfully sew a zipper fly by simply following the instructions in this guide.
We are delighted to congratulate you on your success.
We sincerely hope that you found this training to be both enjoyable and helpful. Why not give sewing a zipper fly a shot now that you know how to do it quickly and easily? In the event that you have any inquiries or comments, please do not hesitate to submit them in the comment section below.
Frequently Asked Questions
Is there a trick to fixing the zipper?
A simple method can be used to fix a zipper that has become unattached. All you need is some petroleum jelly, a commodity that can be found in almost every home. To begin, spread a thin layer of petroleum jelly on both sides of the zipper.
After that, give the zipper a light wiggle in both directions until it starts functioning again. If you perform this one easy repair, your zipper will function just like new in no time. Several different approaches can be taken to fix a broken zipper. The first method involves securing the zipper stop on one side of the zipper by using pliers. Applying liquid detergent intended for washing the teeth of the zipper is another option.
What are the three types of zippers?
The three primary categories of zippers are coil, plastic, and metal zippers. A continuous length of coiled wire is used to make coil zippers, which are then placed into fabric or other materials to complete the zipper.
Plastic zippers have teeth molded from plastic and are attached to a sewing machine using fabric tape. Stamped teeth are used in constructing metal zippers, which are bonded to fabric tape.
Do you sew a zipper open or closed?
When sewing a zipper into a garment, you must first baste the opening closed. This helps keep the seam in place and allows you to sew the garment seam with the same seam allowance as the rest. After sewing the garment seam, you can machine-baste the zipper opening’s seam allowances together and press the seam open. It is important to note that when sewing the zipper, the teeth should be face down and away from the edge of the fabric. You can hold it in place using pins or Wonder Tape.
Once the zipper is in place, you will sew along the left side, keeping the same distance from the center as you did on the right side. You will then sew across the bottom of the zipper and stop at the opposite bottom corner. Pivot and sew toward the top of the zipper, moving the zipper pull as needed. To select the correct zipper length, check the item you are making and consider individual body proportions. A long zipper opening will reduce strain on the fabric and make it convenient to put on and remove the garment.
Can you use a zig-zag stitch with a zipper foot?
Yes, it is possible to utilize a zig-zag stitch with a zipper foot. This is because the zipper foot allows the needle to get close to the fabric, which is crucial when sewing a zig-zag stitch. In addition to installing zippers, the zipper foot can be used to create and insert piping or cording.
Do I need a special foot to sew a zipper?
Every sewing machine comes equipped with a zipper foot which is necessary for sewing zippers. You may quickly acquire a zipper foot from any fabric or craft store if the one that came with the machine that you received as a gift or that you purchased used did not include one.
Is button fly better than zipper fly?
There are numerous reasons why individuals may favor button-fly jeans over zipper-fly jeans. One explanation is that jeans with a button fly tend to be more comfortable, especially after prolonged use. Another reason button-fly jeans are less prone to break or fall apart is that they lack a zipper fly. Moreover, button-fly jeans provide superior support and stability compared to zipper-fly jeans. People may prefer the appearance of button-fly jeans over zipper-fly jeans.
How do you hand sew a zipper on a fabric?
To hand sew a zipper onto a fabric, first finish the edges of the fabric. Then, place the zipper face along the seam and pin it down with the teeth centered along the seam. Next, open the zipper fully. Finally, slip-stitch the fabric into place on the zip.


